html2canvas 和 html-to-image,及低版本浏览器中 html-to-image 的兼容问题处理
业务场景中两个方案对比效果
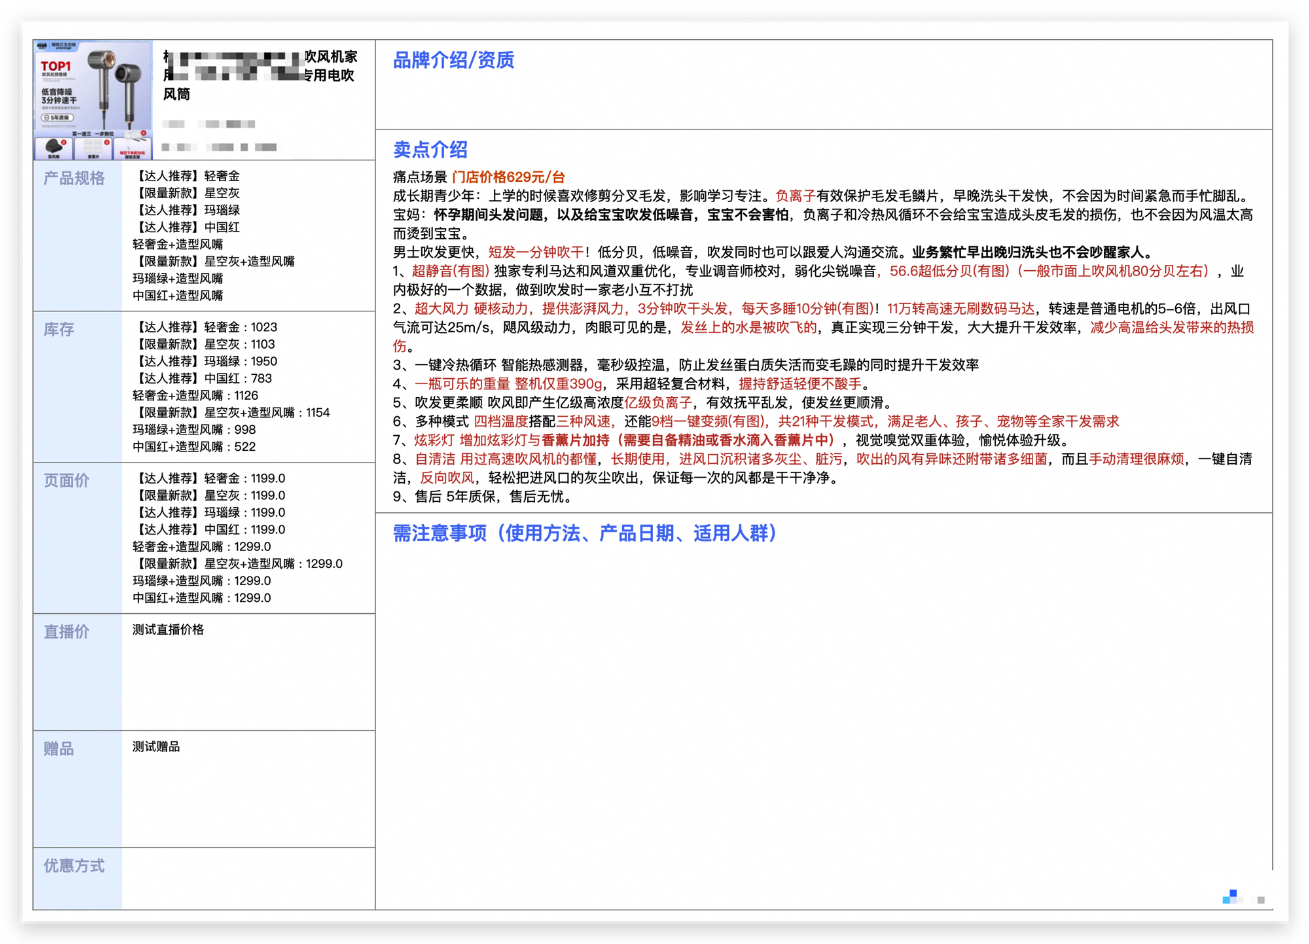
html-to-image.gif
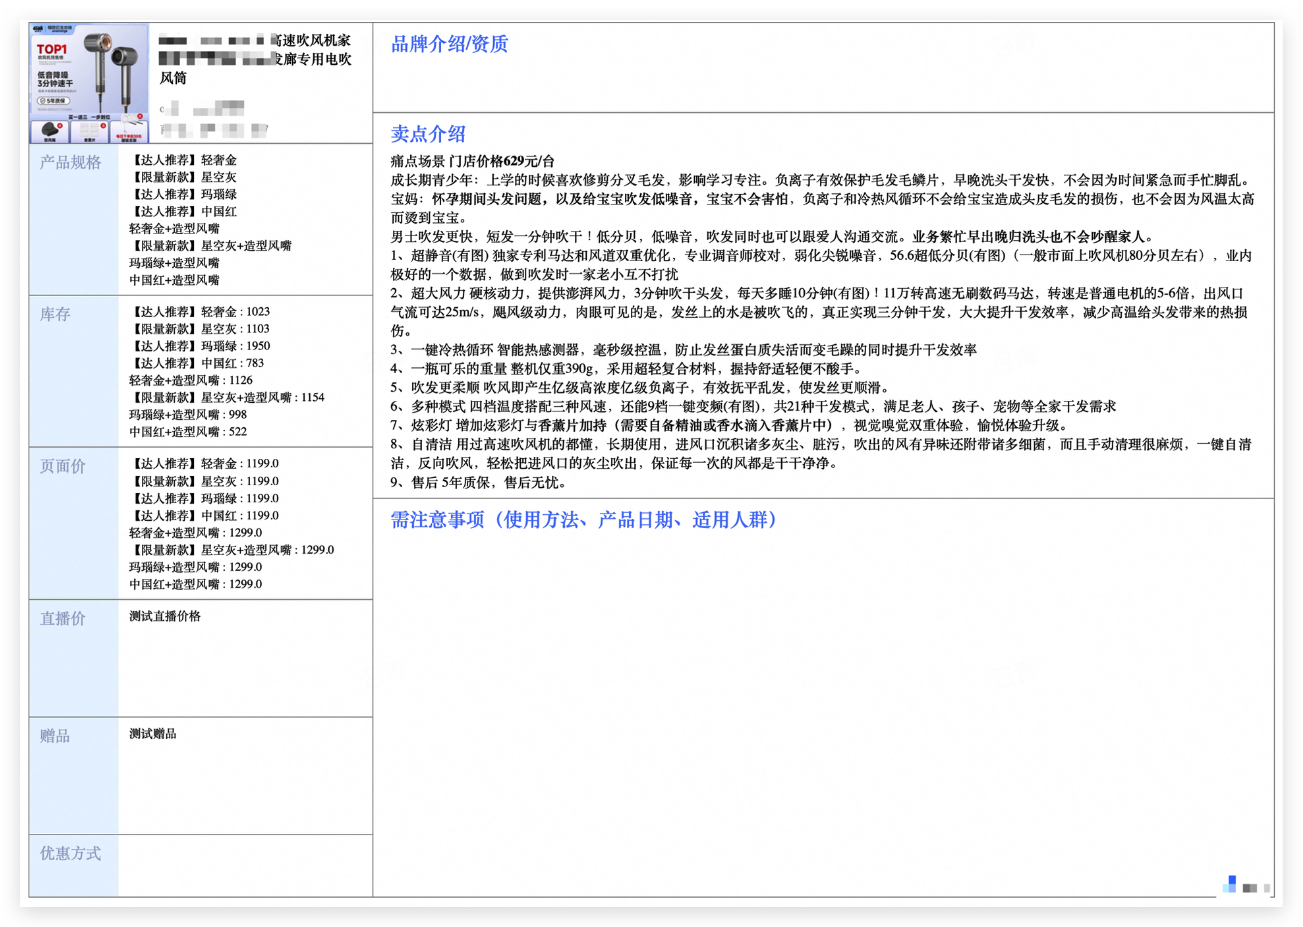
html2canvas.gif
明显可以看到点击的【预览手卡】之后,有一段时间的卡顿
| html-to-image | html2canvas |
|---|
| 包体积 | 5.01 kb | 3.38 MB |
| 工作原理 | svg | canvas |
| 缺陷 | 低版本兼容有问题 | ![]() 需要手动转为 base64,再传入 需要手动转为 base64,再传入 |
| 使用体验 | 转换速度足够快,但是低版本浏览器不支持 inner style | 低版本兼容性没问题,但是太重,转换速度慢 |
html-to-image
- 递归克隆、处理 dom 节点
- 将 dom 转化为 svg
- 将 svg 处理成图片画到 canvas
- canvas => 图片
拿 html-to-image 中的 toPng 为例
一切的源头: https://github.com/bubkoo/html-to-image/blob/b751cbf212ccc7909077bc105b0630f9c845389a/src/index.ts#L71
- 传递 node 节点和相关配置,返回 canvas
const canvas = await toCanvas(node, options)
1
2
3
4
5
6
7
8
| export async function toPng<T extends HTMLElement>(
node: T,
options: Options = {},
): Promise<string> {
const canvas = await toCanvas(node, options)
return canvas.toDataURL()
}
|
- 调用 toSvg 方法,得到 svg,再绘制到 canvas 中,返回这个 canvas
const svg = await toSvg(node, options)
1
2
3
4
5
6
7
8
9
10
11
12
13
14
15
16
17
18
19
20
21
22
23
24
25
26
27
28
29
30
31
32
33
| export async function toCanvas<T extends HTMLElement>(
node: T,
options: Options = {},
): Promise<HTMLCanvasElement> {
const { width, height } = getImageSize(node, options)
const svg = await toSvg(node, options)
const img = await createImage(svg)
const canvas = document.createElement('canvas')
const context = canvas.getContext('2d')!
const ratio = options.pixelRatio || getPixelRatio()
const canvasWidth = options.canvasWidth || width
const canvasHeight = options.canvasHeight || height
canvas.width = canvasWidth * ratio
canvas.height = canvasHeight * ratio
if (!options.skipAutoScale) {
checkCanvasDimensions(canvas)
}
canvas.style.width = `${canvasWidth}`
canvas.style.height = `${canvasHeight}`
if (options.backgroundColor) {
context.fillStyle = options.backgroundColor
context.fillRect(0, 0, canvas.width, canvas.height)
}
context.drawImage(img, 0, 0, canvas.width, canvas.height)
return canvas
}
|
- cloneNode => 一系列处理(如下)=> 得到 svg
1
2
3
4
5
6
7
8
9
10
11
12
13
14
15
16
17
18
| export async function toSvg<T extends HTMLElement>(
node: T,
options: Options = {},
): Promise<string> {
const { width, height } = getImageSize(node, options)
const clonedNode = (await cloneNode(node, options, true)) as HTMLElement
await embedWebFonts(clonedNode, options)
await embedImages(clonedNode, options)
applyStyle(clonedNode, options)
const datauri = await nodeToDataURL(clonedNode, width, height)
return datauri
}
|
问题: 为什么在低版本的浏览器中,html-to-image 的 inner style 会失效呢?
问题表现:toPng 之后,inline style 样式丢失
浏览器: chrome89 以下、搜狗浏览器
clone 源码进行调试看看
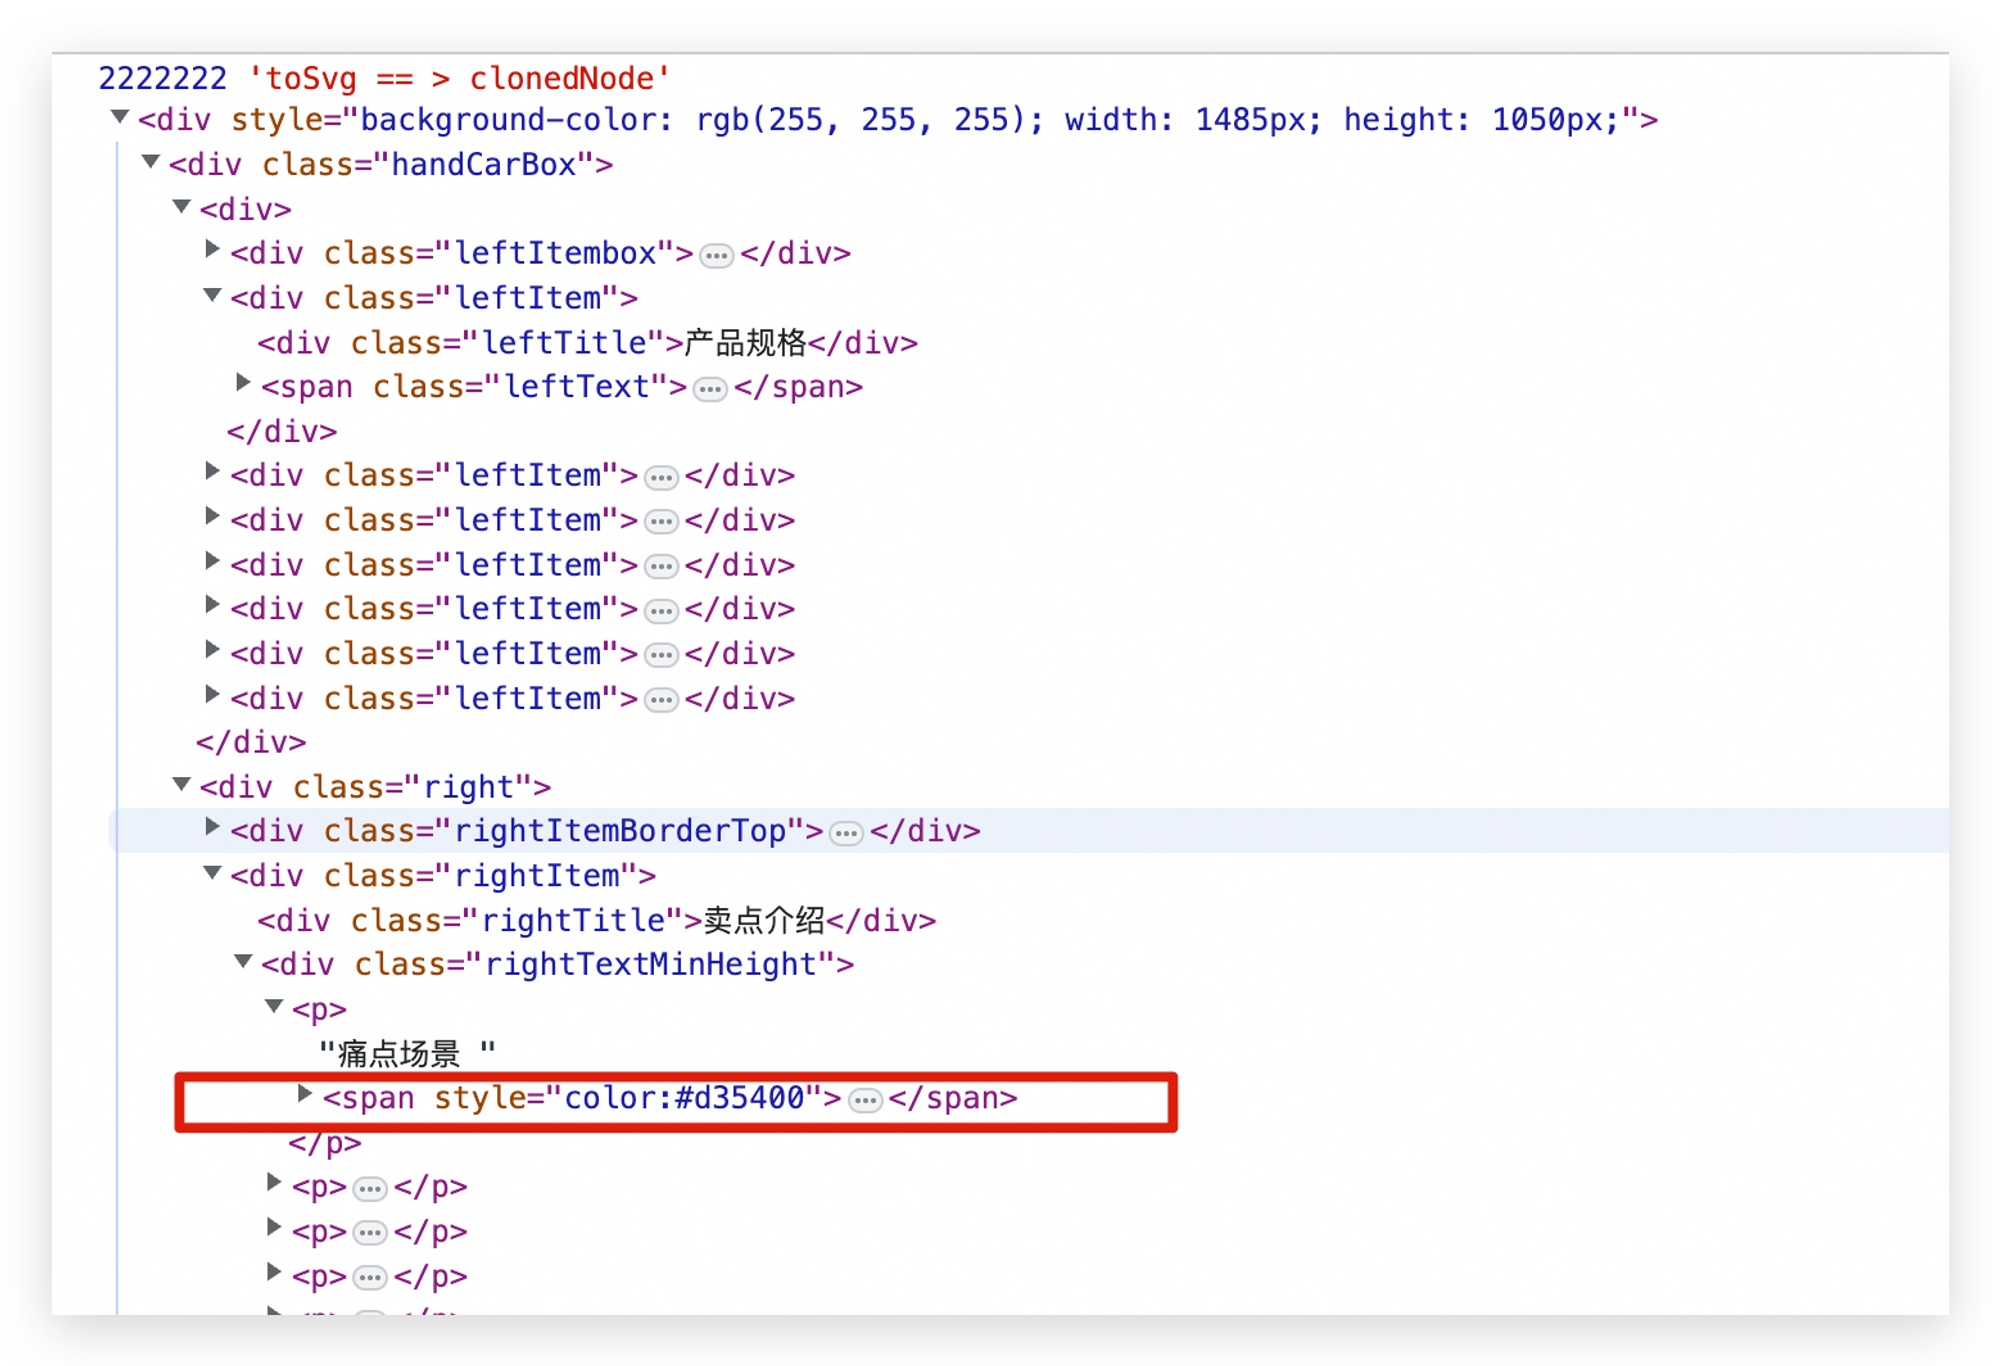
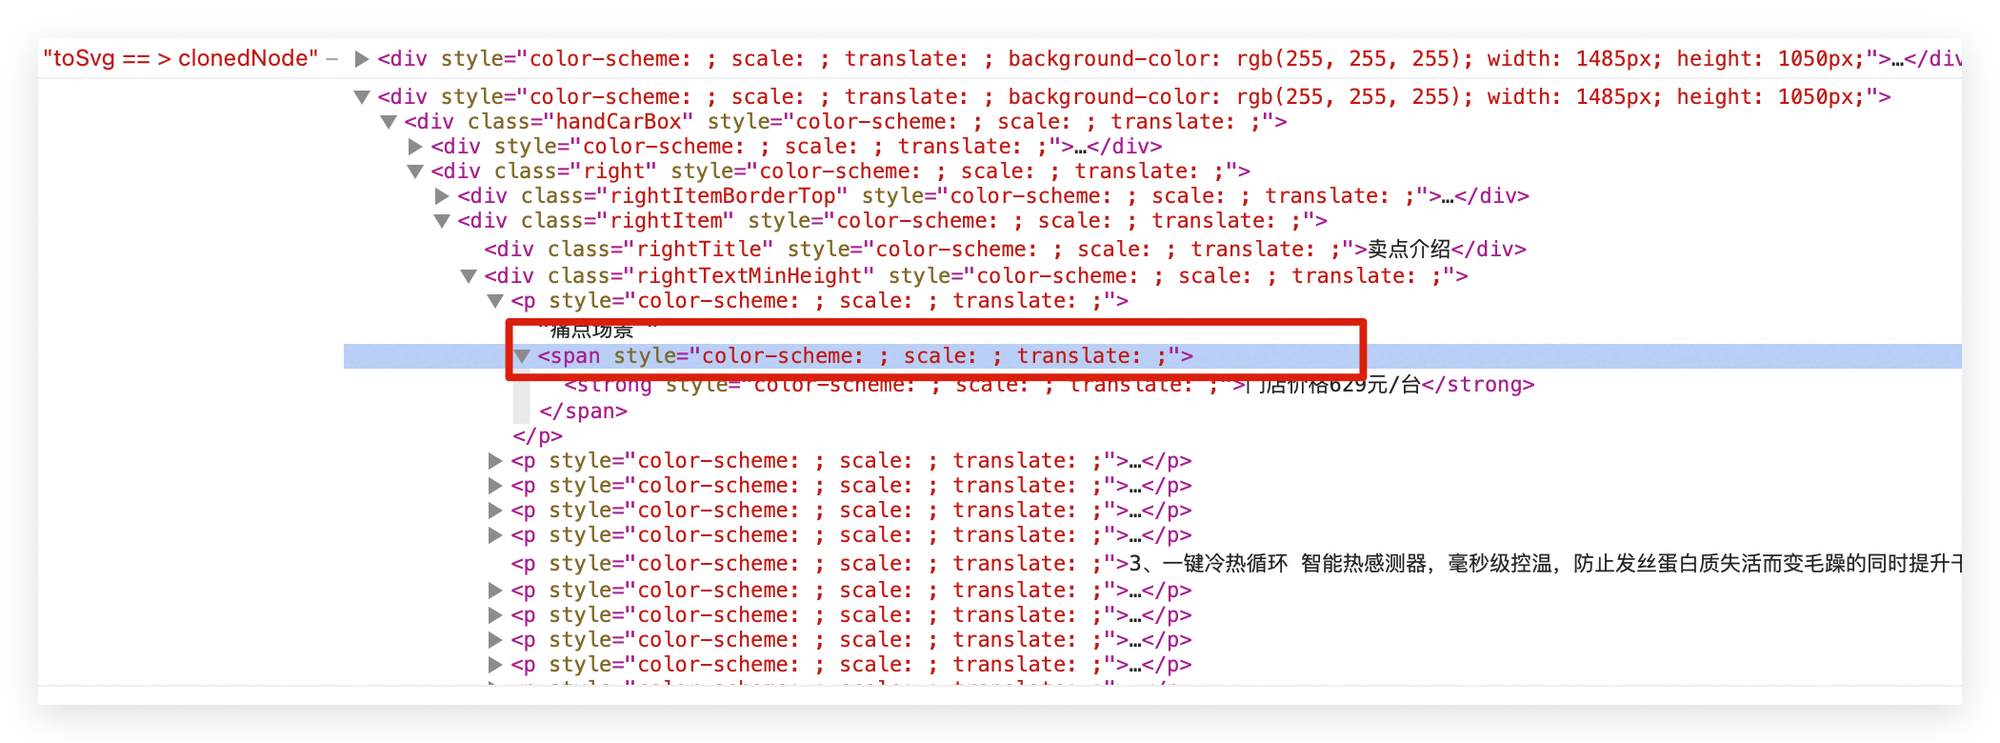
可以看到在低版本浏览器中,inner style 被转成了错误的格式,举例如下,在高版本中显示的是style="color: #d35400" (P1)但是低版本中被转换失败,变成了style="color-scheme: ; scale: ; translate: ;"
初步找到了原因,toSvg 执行的时候,传入的 node 就已经出问题了,继续往下挖 👇 加入一些打印,看看在哪一步处理 dom 出了问题
1
2
3
4
5
6
7
8
9
10
11
12
13
14
15
16
17
18
19
20
21
22
| export async function toSvg<T extends HTMLElement>(
node: T,
options: Options = {},
): Promise<string> {
const { width, height } = getImageSize(node, options)
console.log(222222, 'origin', node)
const clonedNode = (await cloneNode(node, options, true)) as HTMLElement
console.log(222222, 'after clone', clonedNode)
await embedWebFonts(clonedNode, options)
console.log(222222, 'after embedWebFonts', clonedNode)
await embedImages(clonedNode, options)
console.log(222222, 'after embedImages', clonedNode)
applyStyle(clonedNode, options)
console.log(222222, 'after applyStyle', clonedNode)
const datauri = await nodeToDataURL(clonedNode, width, height)
return datauri
}
|
根据打印出来的结果,发现 after clone 之后,开始出现了错误,inline style 丢失,那么继续往 cloneNode 中深挖

1
2
3
4
5
6
7
8
9
10
11
12
13
14
15
16
17
18
19
20
21
22
23
24
25
26
27
28
29
30
31
32
33
34
| export async function cloneNode<T extends HTMLElement>(
node: T,
options: Options,
isRoot?: boolean,
): Promise<T | null> {
if (!isRoot && options.filter && !options.filter(node)) {
return null
}
return Promise.resolve(node)
.then((clonedNode) => {
console.log(
'before cloneSingleNode',
node,
clonedNode,
clonedNode?.style?.cssText,
)
return cloneSingleNode(clonedNode, options) as Promise<T>
})
.then((clonedNode) => {
console.log(
'before cloneChildren',
clonedNode,
clonedNode?.style?.cssText,
)
return cloneChildren(node, clonedNode, options)
})
.then((clonedNode) => decorate(node, clonedNode))
.then((clonedNode) => ensureSVGSymbols(clonedNode, options))
}
|
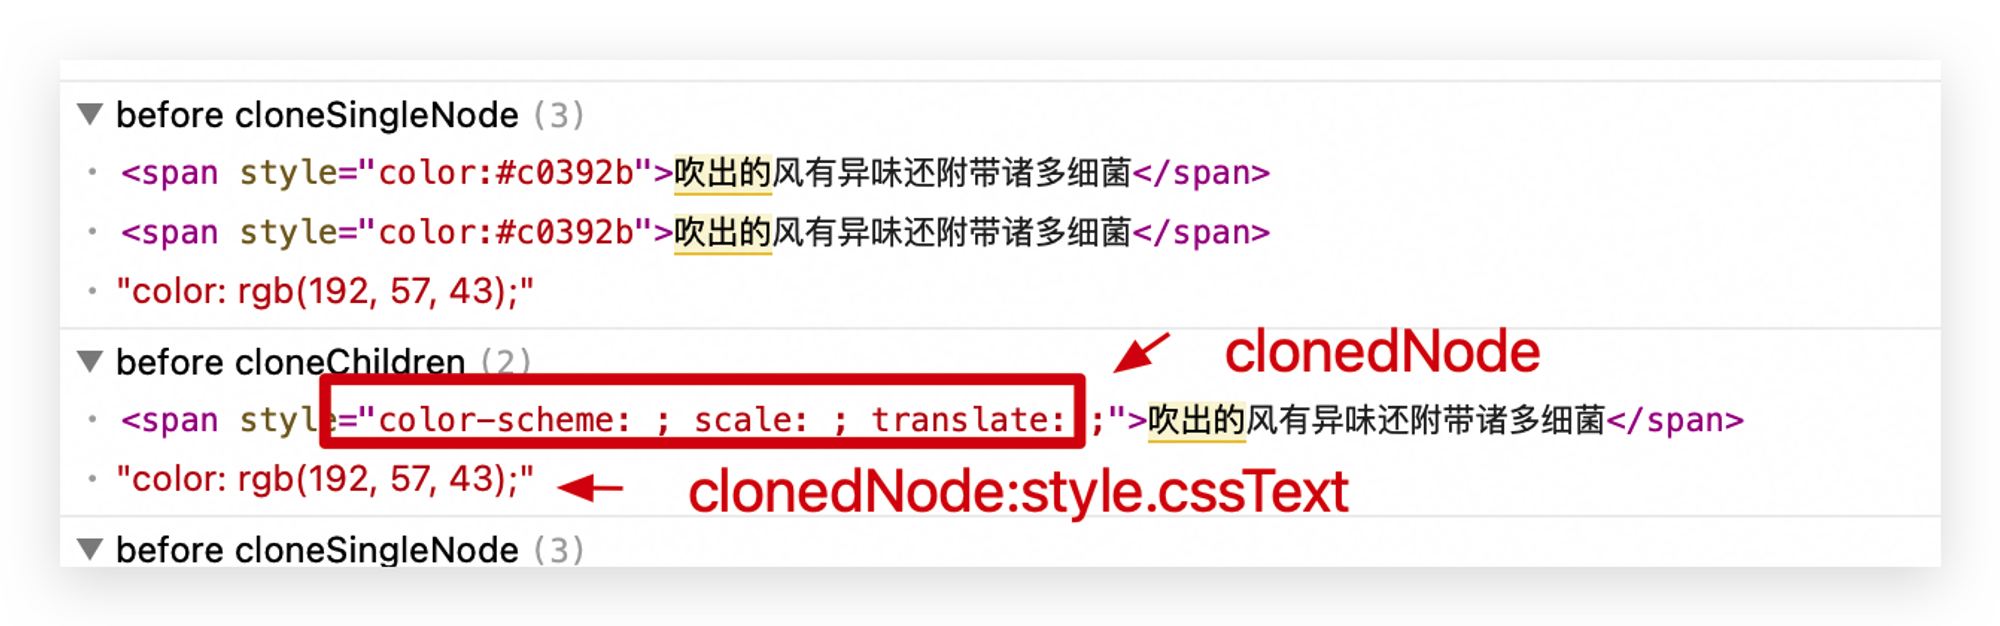
观察到,在 clone 过程中,inline style 变成了style="color-scheme: ; scale: ; translate: ;"
但是通过clonedNode.style.cssText 是可以获取到正确的 inline Style 的
到此,问题似乎没法通过html-to-image 直接解决….
那么,联想到html-to-image 可以支持<style> 标签,是否手动将 inline style 抽离出来,并手动赋值一个 class 呢?
说干就干,通过以下两个方法对 dom 节点,先遍历处理一遍,class 通过 uuid 生成
1
2
3
4
5
6
7
8
9
10
11
12
13
14
15
16
17
18
19
20
21
22
23
24
25
26
27
28
29
30
31
32
33
34
35
36
37
|
function handleChildrenInlineStyle<T extends HTMLElement>(node: T): string {
const children = [...node.childNodes];
return children.reduce((previousValue: string, currentNode: ChildNode) => {
const cssText = _.get(currentNode, 'style.cssText', null);
let uuid = '';
if (cssText) {
uuid = `_${uuidv4()}`;
(currentNode as HTMLElement).classList.add(uuid);
previousValue += `.${uuid}{${(currentNode as HTMLElement).style.cssText}}`;
}
const childStyle = handleChildrenInlineStyle(currentNode as T);
return previousValue + childStyle;
}, '');
}
export function handleChildren<T extends HTMLElement>(node: T): HTMLElement {
const customStyle = document.createElement('style');
const packInlineStyle = handleChildrenInlineStyle(node);
customStyle.innerHTML = packInlineStyle;
node.appendChild(customStyle);
return node;
}
|
效果: 低版本功能正常
其他考虑:
- uuid 通过 vite 打包后,体积仅 0.59kb,但是查看了 yarn.lock 中,发现
@ali/video-tracker中有依赖uuid@^8, 那么相当于项目本身就装了 uuid ,对最后的打包体积没有影响!
1
2
3
4
| dist/assets/style-b1674573.css 202.45 kB │ gzip: 30.34 kB
dist/assets/uuid_vendor-cf522c50.js 1.14 kB │ gzip: 0.59 kB
dist/assets/index-6b7d8afc.js 423.37 kB │ gzip: 135.41 kB
dist/assets/vendor-2ef5f73f.js 3,555.39 kB │ gzip: 1,059.69 kB
|
- 是否可以通过用户升级浏览器版本来直接兼容?
- chrome 需要升级到 89 及以上
- 搜狗浏览器目前官方最新的 11 版本,内核是 chrome80,内测版 12.1beta 升级为 chrome94,可以升级到 12.1beta
- 360 极速浏览器,最新版 21.0 使用 chrome95 内核
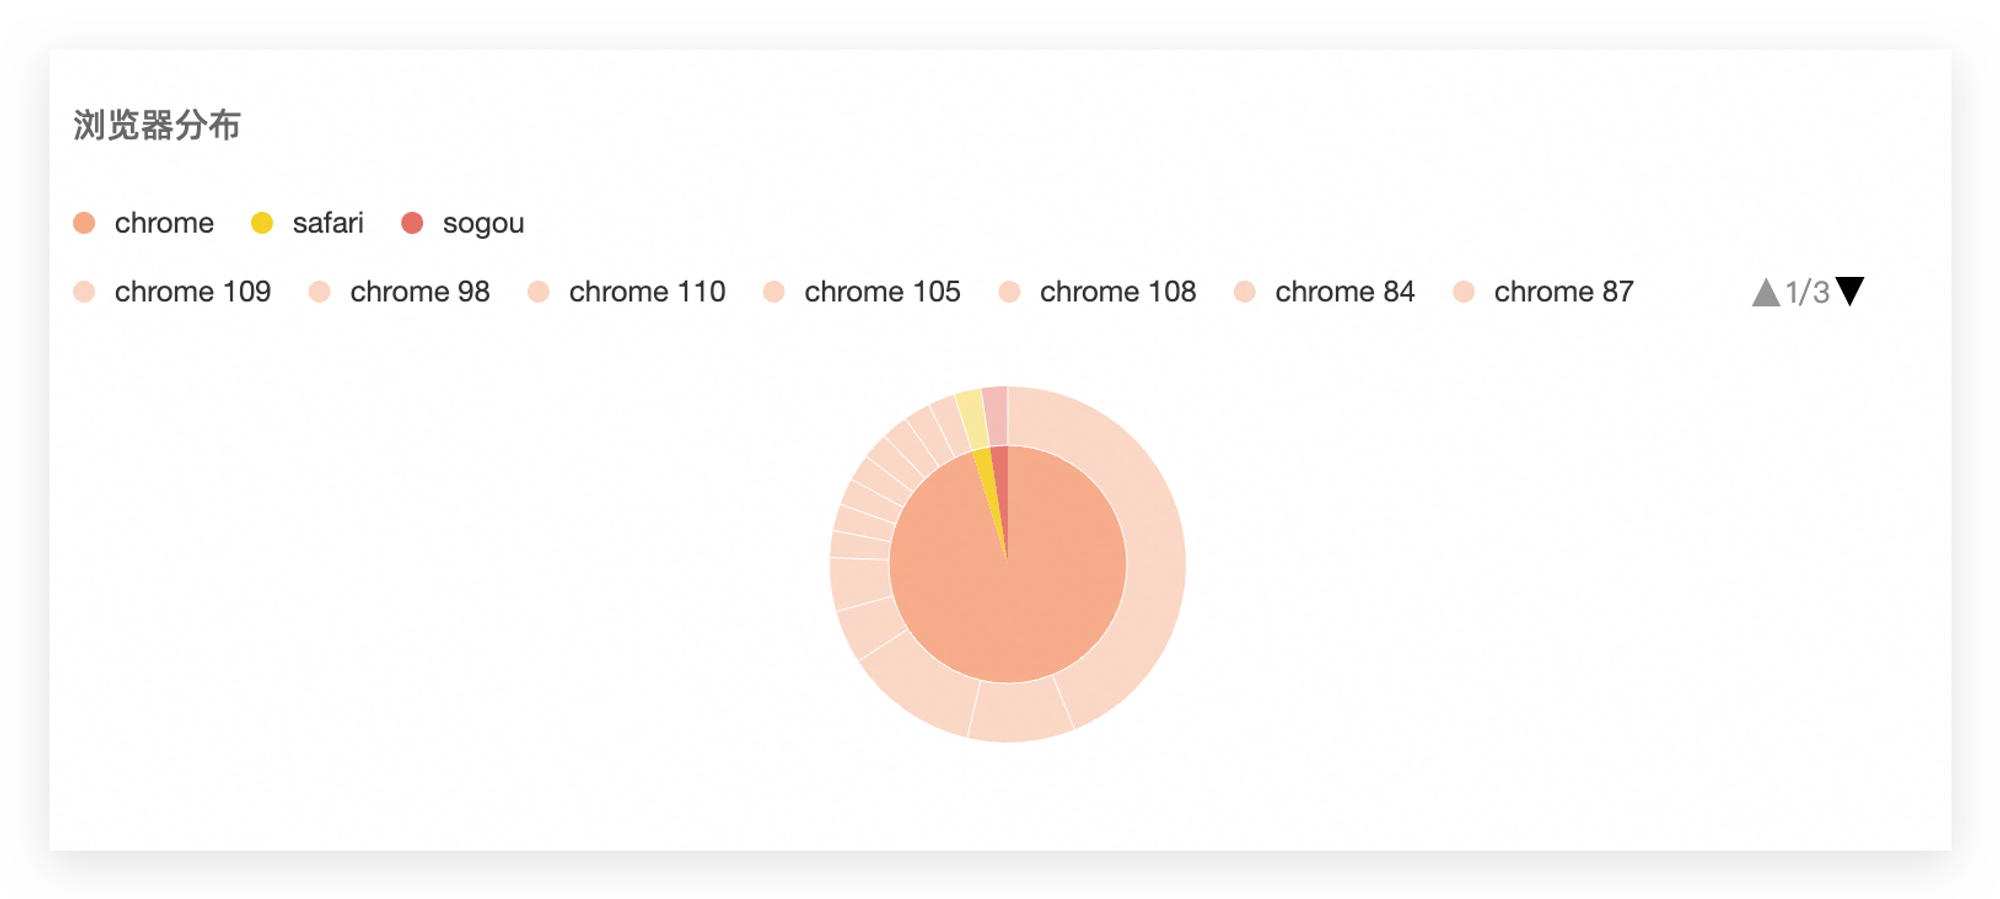
- 客户浏览器分布
参考内容/工具:
- html2canvas: https://github.com/niklasvh/html2canvas
- html2canvas 库 options 配置:https://html2canvas.hertzen.com/configuration
- 网易云游戏-白嫖 pc 虚拟机 : https://cg.163.com/#/pc
感谢阅读,勘误、纠错或其他请联系progerchai@gmail.com,或者点击这里提 issue 给我
欢迎交流 👏,你的每一次指导都可以让我进步